Architecture composition with blender
There is quite some time that I wanted to do such a tutorial. Blender is a fantastic creation platform, people who use blender for other things like animation know that well. But in the field of architecture, it is used almost exclusively for making what is commonly called architecture visualization, which is making nice renderings of a project to convince clients and investors to buy it.
But Blender can be used for other things that just rendering. It is made to be a creation tool, and we architects can use it that way too, as a complete platform for creating and developing projects. I'll try to show you here how, with a competition project I and Maíra made recently, that didn't pass the jury....
The start
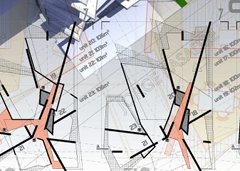
The beginning of an architecture project is for me totally dependent of hand sketching. You don't read a project program, then sit in front of your CAD program, and start drawing walls. Everyone who needs to create something knows the anxiety of the blank page, and everyone needs to find his own ways of igniting the creation process. For me it comes with sketching. The problem you have to solve makes you think in things. Draw those things, draw the site, draw other things that are on the site, buildings, roads, etc... Draw lines that connect things between which you see relationships. Draw people, draw small abstract things that people draw when they are on the phone, anything. Then, other ideas will come by looking at your own drawings.
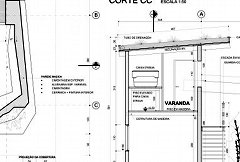
At some point, you think, THIS might be a good idea. Then, try to draw it a different way or from other points of view. You'll quickly see things that you like, and also, if you are honest to yourself, problems that could arise. That's important, because at some point you will need to deal with those problems. But my opinion is that we shouldn't turn away from a solution we feel interesting because of problems it may contain. Problems are there to be solved.
Sketching in Blender
An important point for me is that the whole creation process must be fast. When you are sketching, things go extremely fast. There is almost no delay between the formation of an idea in your mind and your hand putting it on paper. You hand knows better than yourself, in many cases. You, you will understand only when you'll see it drawn. I try to achieve the same speed in Blender, because I think it is fundamental, for your mind to feel free to wander where it wants.
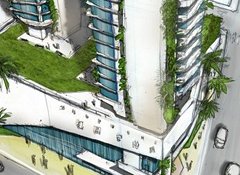
In GLSL mode you can work very fast with images and sketches, because everything is adjusted visually, without any tedious scaling or precise positionning. The precision will come after. Here I just put Blender in GLSL mode (Game menu -> GLSL materials) and the 3D view in texture mode. Then I put two planes one a bit above the other, added an image of the site on the lower one, scaled it to match image proportion with ALT-V, and put one of my sketches on the upper one, with a bit of transparency. I then scaled everything to match more or less the blender grid (You know the bottom line of the terrain is 120m, you match that to 12 grid squares).
Then I put a light above (in GLSL mode, without lights, nothing appears), and started drawing some simple planar shapes over the most important parts of the sketch. I added more shapes, and duplicated some of them to form different floors. I added other planes in other colors to see where I could set park areas. I also extruded some volumes to see how I could have "towers", rising above the rest. Once you know that one blender grid unit is, say, 10 meters, we can easily draw things "more or less" to scale. At this point, "more or less" is a perfectly valid precision level.
Quick area checks
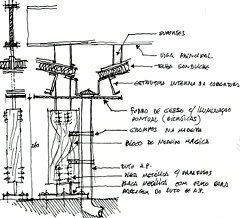
At that point, the schema is sufficient for you to make some basic checks. One thing that you must put immediately in the right direction is your area ratio. In this case the project program asked for a total floor area of 3x the site area, to be divided in 60% housing and 40% office. Some time ago I made a script that calculates volumes and areas of selected objects. If objects are valid closed (manifold) solids, (other script to check that here), their volume is calculated, otherwise, their total face area. With this script I extracted the whole area of my planes (which would become housing), and volumes of my two "towers". I then divided that volume by the height of a typical floor (3.50m), then by the number of floors I could put in the towers, and I had my two areas, housing and office. The total was more or less okay, but I had a bit too much housing. So I "growed" a bit the office towers and removed a couple of smaller planes.
I then added a bit more stuff, like white areas under the black bars, where would come big concrete slabs that would form the base structure of the whole project. That made me think those slabs could also support big hanging gardens.
When ideas stop coming
Of course ideas will stop coming at some point. That's a good moment for exploring side-subjects. For example, work on the terrain. The terrain plane I set up at the beginning is simply OrCo-mapped, and it will stay so no matter how you cut into it, as long as you keep the borders where they are. So, you can cut, extrude, raise, lower parts of it as you like. There is nothing like working on the "real" terrain, something very different than what you do with traditional CAD workflow. The heights of the buildings were approximated, since I didn't have the right data, but it is more than sufficient to feel how your own project integrates with its surroundings.
This is an excellent exercise to do, because it helps you to leave your 2D planes and think about your project in 3D. I also put some accent on the things I liked in the project, for example I set a couple of objects to show edges, and I drew "force lines" above the project, to help me see where big directions emerge in the project. I then put those foce lines in a group, so they appear in different color.
Do this for a while, without thinking, just marking or reforcing things that are already there, and no doubt, in a short while ideas will come back...
Explore your own creation
We often think that an idea must be formed in our mind before beign output to something. In my case this is usually completely wrong. I must look at what I did to undersand it. If you look at your model in a lot of different angles while you work on it, you'll quickly spot cool angles where you suddenly see how cool your project is (not that I think my project is so cool now but that's what you think at that moment). And, since we are not totally dumb, remember them for later, for example by putting a camera on the scene and saving its positions to different keyframes.
Like always, we must stay alert for problems. Usually we do see problems in our design, but I think our mind tries to hide them from us. There are a lot of checks we can do, one of the most spectacular being real-time GLSL mode shadow tests. Simply turn your lamp into a spotlight, adjust the intensity, and move it around to explore how your project casts shadows... It is unprecise, but absolutely sufficient.

A lot of other Blender features are helpful, such as using wireframe display to see concentrations and density, grouping your objects in different layers and try turning them on or off (you might surprisingly find out that some parts are totally unnecessary).
At that point I felt that the main "pieces" of the project were getting into place, so I also began to add some detail, such as the containers that would become housing units. I made one simple box that I Alt-Duplicated so I could refine them all at once later. I also used the former big black boxes to define a secondary metallic structure that would support the containers.

Problems solving
Time for a first rendering. No OSA, a bit of ambiant occlusion and our only light we have since the beginning, just to feel the masses and the shadows. We must stay fast, remember...

Now normally is the time where the problems we got aware of earlier are becoming really annoying, and you cannot avoid them anymore. In this case, my big problems were to serve all of the units with circulations and make sure all units had at least one view totally open, and no neighbour able to look into your apartment. So I separated my apartment units into layers, and grouped them in "manageable" units.

Piece by piece I then created and connected strips of circulations, corrected apartment orientation and separated apartment units in different typologies. Looking at your model in orthogonal views is also often a very useful tool, because it helps you to see alignments in things. The traditional 2D workflow of architects also has its reasons to exist, and we should regularily use it. After some work, a coherent circulation system began to appear:

Those circulations took a frightening amount of time to solve. Of course you are the sole responsable for the hard parts of your project, since you designed yourself the causes of your problem. That is something we should never fear or avoid, but simply face. You can sometimes see it like a chess game with yourself, where you switch sides. Solving the problems you created yourself is in my opinion one of the fundamental tasks of an architecture project.
During this process, switch constantly the visible layers, the shading mode, the view angles. In wireframe mode, using very different colors for groups and selected objects give you a wide range of visualization modes. All this is necessary so you see everything and understand exactly what you are doing.

Make your screen look good
This is something I believe much in. You must like what you see on the screen. When you work with pencils and paper it is even more obvious. There is a strong connection between a nice drawing and a good project. Thinking about your own drawing: "this is cool" is a good sign that your project itself is getting cool, even if what you see on the paper or on the screen doesn't represent well the project. For me this is maybe the strongest point of working with blender. Instead of boring, serious CAD-like environment, I can work on my project with funky colors, crazy ultra-dynamic perspective angles, transparency effects, textures, drawings, lines, masses, and I can make a blender theme with colors that matches all this. The result is that your screen shows you something you like, and that's the best way to make something good.
Besides that, I also began doing some rendering tests, to see what kind of graphical aspect I'd go for on the final presentation. I tried using sharp lighting, one single material, blender's built-in edges system and the freestyle branch. I finally decided that I liked most the builtin edges, faster than freestyle and more explicative than other styles.
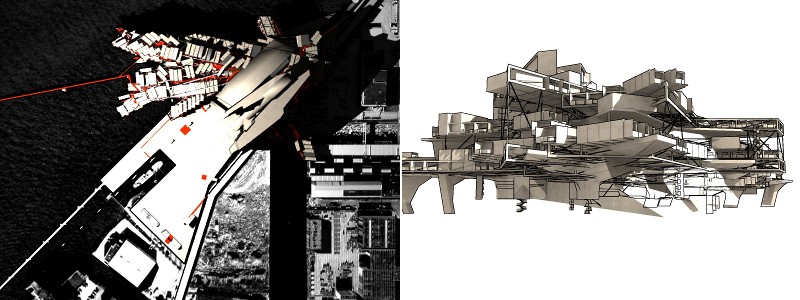
And I continued working on the finishes, materials & details.

Final steps
When the deadline got very close, I had to stop.
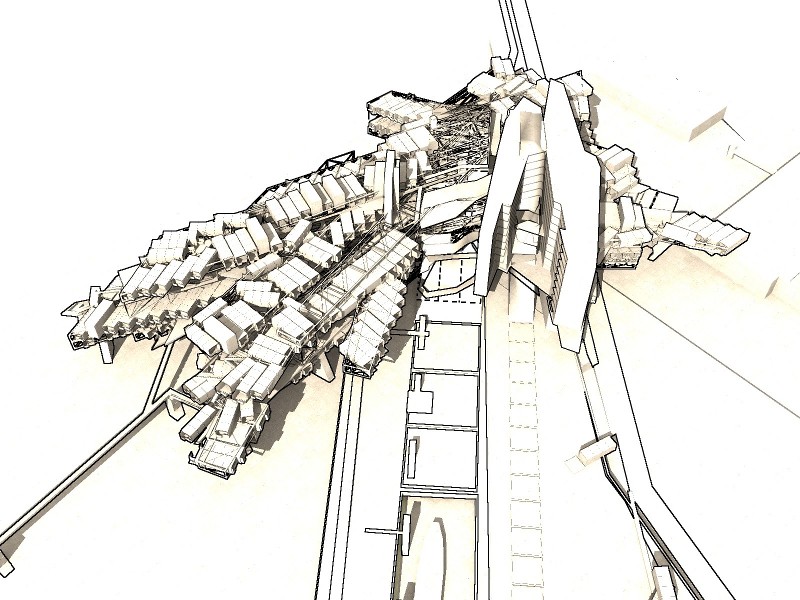
Then I rendered the series of views I had already planned during the process, and made plan and section views, simply by making a copy of the model, cutting through it with the knife tool and removing the unneeded part. There are more automatic ways to do section views, but in this case I wasn't really needing any automated way, and this method had the advantage of showing edges on cut lines.
Remember about solving your own problems? This is where you need to have done it well. If you didn't solve correctly all the problems that would appear at the level we are cutting through now, they will appear very, very obviously...
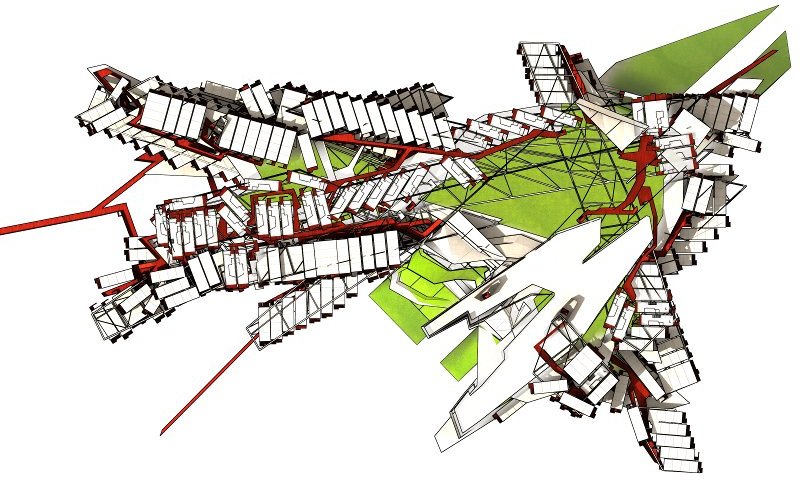
Since it was a rather conceptual project (and since there was no more time to fix), I decided to use the plans anyway, so I drew some sketches of how I wanted the presentation boards, mounted a layout in inkscape, and inserted everything there.
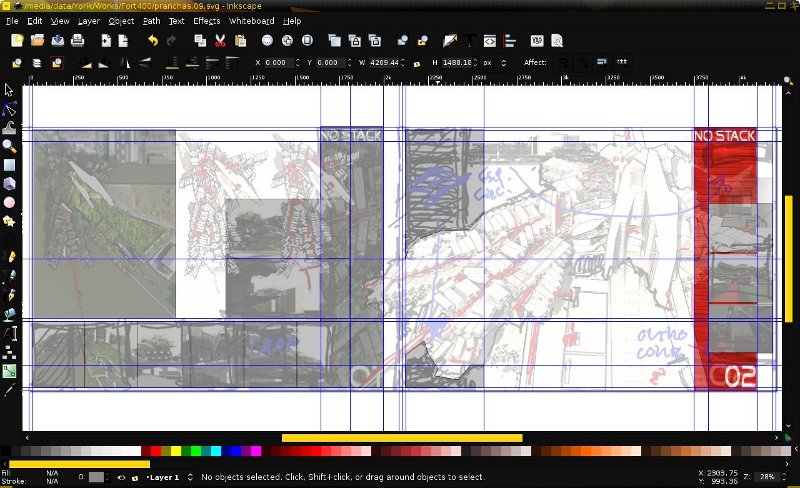
That's it, basically. Of course this works when you are doing something like a competition project, where you don't need a very high level of precision. When you need to build the thing, a moment will come where this workflow won't serve you anymore. But I believe neverthless that if you are serious with your problem-solving, accuracy won't be a big issue. You can export your blender work for CAD drawing and detailing, the current section script and DXF exporter do the job pretty well, and if you spend a bit more time on your model, for example turning your walls into solid things, with the right width, you will be able to export relatively good CAD sections.
I wrote this tutorial mainly to illustrate the use of Blender as a creation tool, not to showcase my project, so leave me any comments you like on my guestblog, but please criticize more at the process than the project itself... Well, thinking better, go ahead, criticize the project too!
Yorik, september 2009
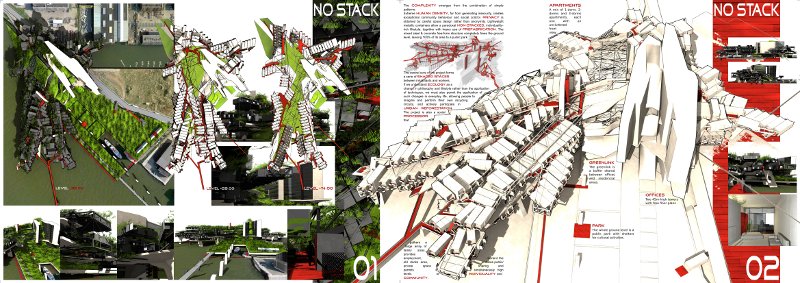
PS - the pdf and blend files of this project are available for download, as well as the theme I used in this article.