| PLANT MAKING
TUTORIAL |
| by Yorik van
Havre, february 2008, blender 2.45 |
| |
| This
tutorial will hopefully teach you how to model, texture and render
realistic-looking vegetation in 3D, similar to what you can find on the
blender greenhouse,
of which the examples below are taken: |
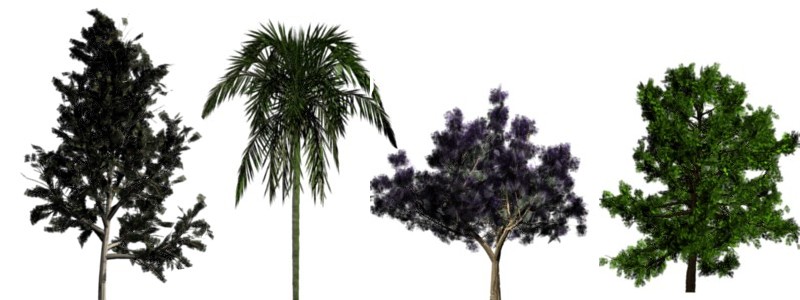 |
| From left to
right, an eucalyptus, a palm tree, a jacaranda and a beech. |
| |
| | |
Of course, we
will use only open-source software, namely ngplant for
tree generation, inkscape
for leaves design, the gimp
for bark and leaves texturing and blender
for the final composition and rendering. So your first step if any of
those is missing on your system, is to install them. All those
application are multi-platform so you can work on the system of your
choice. You can also use your own other applications, since what I will
tell is quite generic. But I encourage you to test these if
you
haven't yet, since they are all great piece of software that everyone involved in computer graphics should know about!
|
| |
| | |
| 1. A BIT OF THEORY |
What
I will tell here are basically concepts I heard for the first time in
an excellent lecture given by arch. Jean Cosse back when I was at
architecture school. Since I found it extremely interesting, I never
stopped to observe... If theory is really, really boring you, you can
skip this step without trouble, but I'll do my best to make it
interesting and, well, not boring...
The first, golden (you'll see why) rule is: In the vegetal world, EVERYTHING
starts from a mathematic rule.
The disposition of trees in a forest. The distance between
different generations of a tree type. The trunk subdivisions. The
placement of the branches. The angle those branches do with the trunk.
The size of the leaves. Their form. Their angle in relation of their
support. The combination of several leaves on their stub. All the
complex construction of the flowers. Everything follows a rule. In my
fridge there are a coulple of green peppers: |
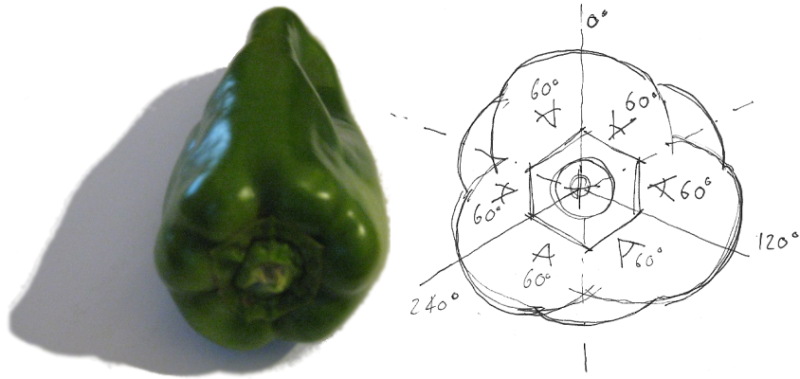 |
They
ALL follow the same rule: 3 principal subdivisions, and then each one
has one more intermediate subdivision. In total, the pepper has 6
subdivisions. You can see that the base, where the pepper is attached
to its branch, is an almost perfect hexagon. You can try that with
anything. Even a banana has very regular geometric subdivisions.
|
Second rule,
there are many accidents,
but they never cancel the rules.
My green peppers all have 6 subdivisions, on the one here
above
you can count them easily, and on the upper right part you can see
almost a seventh subdivision. But it is not. Sometimes plants are
deformed, bent, compressed, they have to adapt, grow in weird
environment, fight against other things, but the rule never gets lost.
The day you'll encounter a green pepper with 7 subdivisions,
it will be a genetic accident, like a hand with 6 fingers. Or
a
clover with 4 leaves...
|
The third one is
by far the most interesting, complex, weird and esoteric rule is the Fibonacci rule.
Here it deserves a bit more explanation, even if we won't use it much
for our purpose. Fibonacci was a 13th century mathematician who
discovered this interesting sequence: make a growing list of numbers,
each time adding one number to the previous one. You start with 1, add
to the preceding one (no number, = zero). It gives 1. Then add 1 to the
previous one (1) = 2. Then 2+1 = 3 then 3+2 = 5 then 5+3 = 8, etc, etc,
so your Fibonacci sequence looks like this:
0, 1, 1, 2, 3, 5, 8, 13, 21, 34, 55, 89, 144, 233, 377, 610, 987, 1597,
2584, 4181, 6765, 10946, 17711, 28657, ...
Well,
it doesn't look like anything useful, does it? Actually, it is simply
the most important evolution code used by the nature. All
vegetal species follow that rule to grow. First one branch, then
another, then two, then three, then five, you understood me. When you
look at vegetation you find the Fibonacci sequence everywhere. It
dictates how leaves appear on a branch. When a new branch
must
begin. How the petals of a flower organize themselves. Where
the
flowers come on the trees, etc...
But
that little sequence does
far more than that. You find it everywhere life grows. The growing of a
population of rabbits follows the Fibonacci rule. The shape of a sea
shell. The way a hive is constructed. The proportion of your body... To
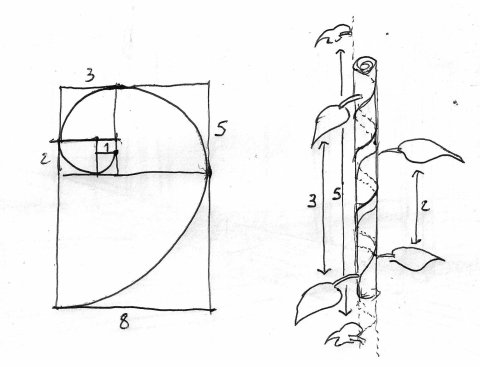
give you just one more example, one of its main use is for constructing
spirals (see below). And guess what? The way leaves are placed
on
a brach follows exactly a Fibonacci spiral (the number of rotations
before a leave is exactly above another one). About 92% of the plants follow this rule, as I've read...
I don't know of you, but all this never stopped to amaze me...
There is one important thing for us in all this: replicating
mathematical behaviours is exactly what computers can do best. The
process used by a program to recreate a tree is very similar to the
process used in nature. As soon as you'll open a tree-generating
software, you'll see that its parameters correspond closely to what's
described here above.
Well
that's enough theory. If you are now very interested in all this, which
is called phyllotaxy, and want to know a bit more, read this
excellent page first, and then googling around you'll find
many interesting sites on the subject like this
one...
And if you happen to know more about phyllotaxy than me, please forgive
the possible mistakes or inaccuracies in this text, or, even better,
notify them to me :)
|
| |
| | |
| 2. OBSERVATION
& GETTING MATERIAL |
If
we are to reproduce a tree, the same way as when we want to reproduce
anything, we need to observe the original very closely. So we need,
basically, pictures of the tree or the plant we want to model. You can
just go out with your camera and take a couple of pictures of your
favorite tree, but there's usually plenty of material on the internet,
just try google image search on your tree name, for example.
If
you don't know any tree name, but you just know you want to make
vegetation that grows in your country, by searching a bit you should be
able to find lists quickly. Try searching for things like common trees,
common vegetation, botanics, with your country name, you'll
find
many things. Once you have the name, finding images is even easier.
Try
to find good resolution images, of the whole tree or plant, so you can
see its shape, and close-ups so you can see how the leaves, flowers,
fruits and bark are.
As
an example, in this tutorial, I'll try to build an Elm, which is a
quite commom northern hemisphere tree and that's missing in my collection... So, since
I have the name, searching for "Elm" in google image search returned me
many nice pictures, and of course a wikipedia page:
|
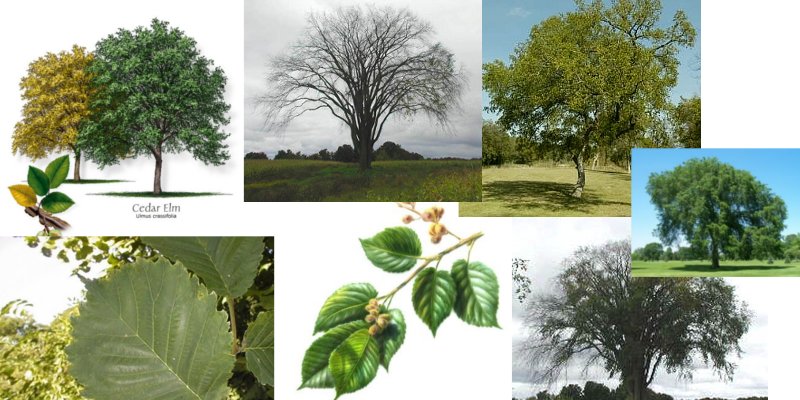 |
You
can see that I concentrated on pictures that show the whole tree shape.
The second top image is very valuable because it shows the branches
very clearly. Illustration images like the second one of the bottom row
are very useful too because they show a "leaves group" rather than a
single leave.
So, we can conclude already a lot of things from
these pictures: The general shape is definitely a ball. The branches
structure start from a thick trunk, and then very long branches start
very early, and go right up, almost vertically, then they bend to form
the ball shape. Observe that "secondary" branches start very late on
the primary ones, about half-way. The leaves also seem concentrated on
the exterior part.
Another interesting thing to look at: Which
one of those images has more atmosphere? Which one looks more the way
we would like our elm to look like? To me it's the last one. It has an
old, haunted look that I like... Elms are sacred trees, used by druids!
So I'll remind that and try to do one like that: dark, with less leaves
on the extremities, and a very thick trunk.
Finally, the last
thing to look at, the colors. It looks like there are quite a lot of
color variations, but it seems to me that something between green and
yellow, dark, would give us a realistic look. We'll do some tests later. |
| |
| | |
| 3. MODELLING: NGPLANT |
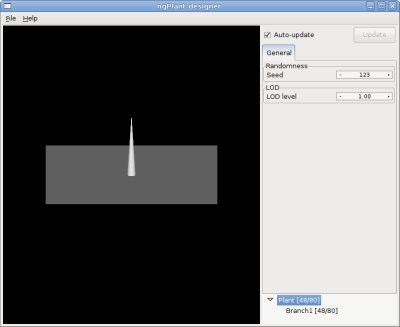
Okay,
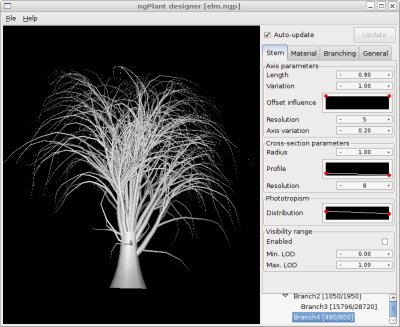
now it's time to open our first software piece, ngplant. The interface
is quite simple. You rotate/pan the view with the mouse
buttons,
and you select/add/remove branches layers from the list
(bottom
right panel). Then, you play with the settings above until your layer
looks right. Each branch layer has a "stem" panel which control the
branch aspect itself, and a "branching" panel which control how our branches are attached to the parent ones.
The material tab we won't
use much because we'll do the materials directly in blender, but you can also do all the materials and mapping here if you want.
The general
tab serves to create randomic variations once our tree is made.
|
 |
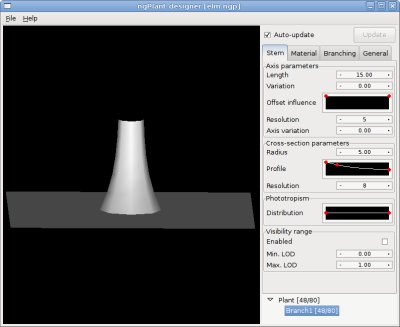
So,
let's get started by making our trunk thick. I'll let you discover how
the parameters work by yourself (there are not many), try to obtain a
trunk like this one (remember our dark haunted tree):
See? Until now it's easy. We just tweaked the cross section parameters.
Okay.
now is the time to look closely at our documentation: See that from the
trunk grow a very narrow group of main branches, starting almost
vertical, that go almost up to the top, then bend to form the "bowl"
shape.
Then we can add secondary branches to them, starting at about a third of the first ones, to refine our bowl shape:
|
 |
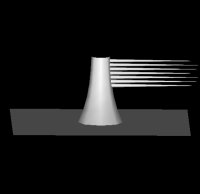 | 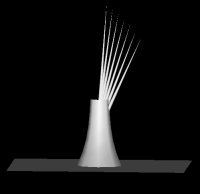 |  | 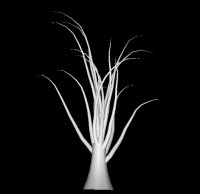 |
| 1. adding a new branches layer, starting at about 50% of its parent | 2. tweaking declination, so we begin to approximate our shape | 3. adding a bit of phototropism, and raising variation value in several parameters | 4. Finally, raising the density and revolution angle, and adding very little variation to the axis. |
| Then we add a second layer of branches, finer, and a bit more "foolish" to add randomicity... |
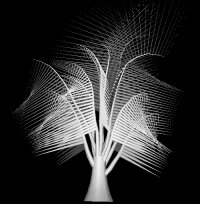 | 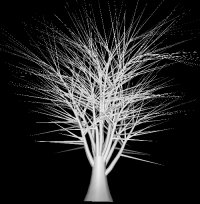 | 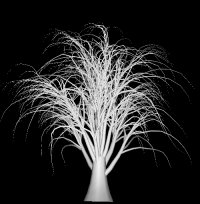 | 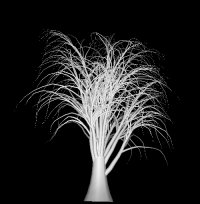 |
| 1. adding a new branches layer, starting at 40% of its parent | 2. playing a bit with declination and revolution angle | 3. lowered the phototropism of the parent, adding phototropism and variation to this one | 4. tweaking sizes and lowering density to match better our shape |
Now
you see that we could go much further, this tree could receive a coule
of more layers, to refine the general "fuzzy" look. But we also have to
be careful not to make our trees too heavy. A good thing to do is to
lower the cross-section resolution of your branches, the faces gain
will be big.
I'll just add one more small branches layer
directly on the trunk, to try to mask a bit the join between the trunk
and the first layer (when there will be leaves).
Okay, that's
more or less accurate, don't you think? We'll need to refine a couple
of things further, but it'll be easier to do that later, with leaves on.
Now, to the funny part: the leaves. We'll add, to begin with, one leave layer on each branch level.
|  |
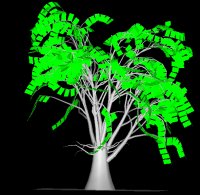 |  | 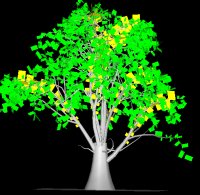 | 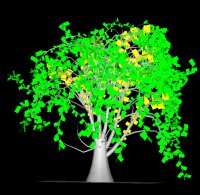 |
| 1. adding a first leaves (quad type) layer on the third branch. give it another color, and make it 2-sided. | 2.
giving them some revolution angle, a bit of declination, and a bit of
scaling, so the further the leave is on the branch the bigger it is. | 3.
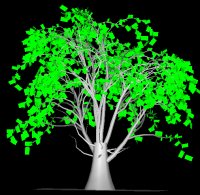
adding another leaves layer, on branch 2. here I made the leaves
bigger, and gave it much scaling, to reinforce the difference between
the middle of the tree and the border of the shape, which is thicker | 4.
making some last tweakings to the branches 2 and 3, to make the whole
tree "fall" more. then, I just added some leaves on the small branches
that grow directly from the trunk. |
Pronto!
We could still work a bit more on it, probably, but it is hard to tell,
maybe once textured it will already look OK this way? So better leave
it so now, and if needed, we come back here later to adjust more.
Notice
how I made the leaves much bigger that they would be normally
(especially the yellow ones)? This is because we won't draw every
single leave. Instead, we will make atextures of "groups of leaves".
This will save us much faces and speed up rendering quite a lot.
In the General tab, you can play a bit with the seed parameter. Later on, we'll use this to produce variations of our tree.
Now, all we need to do is to export our tree to .obj format so it's ready to import in blender. | 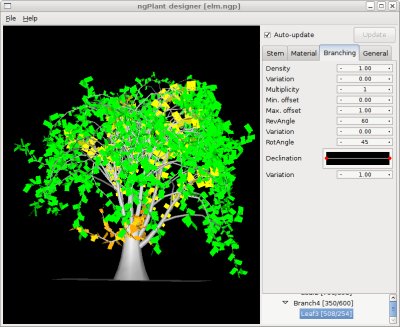 |
| Okay, that's it for now. If you want to have a look directly at the tree used in this tutorial, the ngplant file is here. |
| | | | |
| 4. MAKING TEXTURE SHAPES: INKSCAPE |
So,
enough modelling, let's make some art. On the tree above, I made three
leaves layers: a green one, a yellow one and an orange one for the
small trunk leaves. For the orange ones, since they are few, we can
reuse a texture from another leave set. So we need two. A big one for
the yellow set, and a smaller one for the green set.
Our
documentation shows us more or less how is the shape of the leaves, and
how they are grouped together. One of the pictures even shows us small
dry fruits, that we can add, why not? on one of our sets. So let's fire
up inkscape:
|
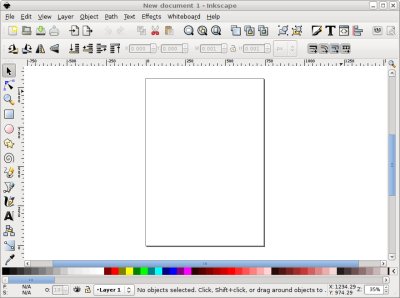 | Okay,
for those of you who don't know inkscape, I'll describe quickly: It is
a vector drawing application, similar to corel draw. It is a bit more
"generic" than corel, has less "production" functions, but, in good
symbiosis with gnome philosophy, it is very simple to use.
So
we have our blank sheet of paper, several drawing tools on the left,
and align/snap/placement tools on the top. Everything we draw is
vectorial, and can receive different styles and colors for its line
contour and filling.
Inkscape saves its files natively in svg
format, but can export to several other formats, such as png, which
we'll use to produce our textures, since png format supports
transparency. |
| So
let's begin with drawing a first leave. There are two useful tools for
that, the Freehand Line tool and the Bezier Curve tool. It depends on
your taste and on the result you want, sometimes one behaves better
than the other. If you can draw well (and especially if you have a
graphic tablet), you'll like the freehand one. I'll use a bit of both
in this tutorial. |
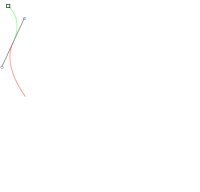 |  |  |  |
| 1.
with the bezier curve tool, begin to draw a leave. simple click
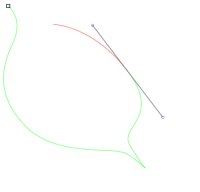
produces a corner point, click+drag produces a bezier smoothed point | 2.
continue the shape, using a single-click point at the base. Don't worry
to be very perfect, don't forget we'll have hundreds of leaves, nobody
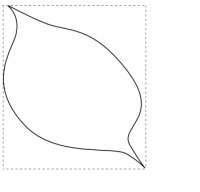
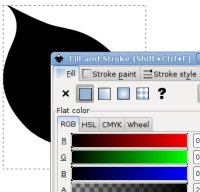
will see small defects. | 3. just
click on top of the first point to finish the shape. Double-clicking on
a finished shape allows you to adjust anything you like. | 4. Open the Color & style panel, and put a black fill paint on our leave. |
| And
there is our first leave! Easy, isn't it? Now let's make a couple of
other ones to make our first group. Try experimenting the Freehand Line
tool too, maybe you find it better. |
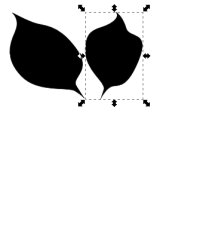 | 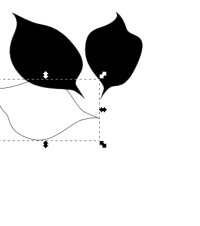 | 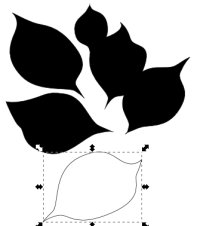 |  |
Really
it is not very difficult, there is no need to be very precise, since
our leave group will appear VERY small when mounted on the model. just
take care of respecting more or less the lemon-like shape of the leave,
and to have the branch start from the bottom. You can of course
copy/paste leaves, but it will look nicer if you make them one by one,
so they will be different. The small fruits and the branch I made using the freehand line tool.
Another thing, remember our Fibonacci
series? Think about it when drawing leaves, in reality they form a
spiral around the branch... (Well, ok, I didn't respect that much...)
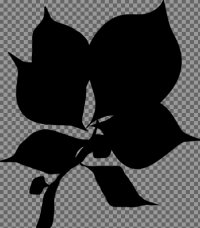
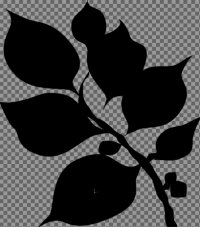
Ok,
let's make another leave group for our other texture, and export both
groups as png files, which will have a transparent background. |
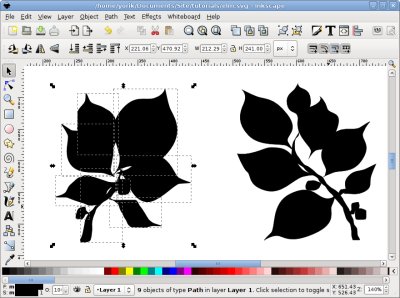 | Use
the Export Bitmap function from the file menu, select one entire group
of leaves, and export the selection as a png file. Choose a reasonable
size, for ex. 600 pixels for width. |
 |  |
Well,
that's it for our leaves. Notice that I've drawn very "smooth" leaves
,without the small "teeth" you can see in our documentation... This is
because inkscape is good with curves, but for doing all these small
accidents we'll have a much easier job doing it with the Gimp. So, to
the next step!
If you would like to have a look at the inkscape file I drew in this tutorial, you can grab it here. |
| | | | |
| 5. PAINTING THE TEXTURES: THE GIMP |
| Now your
artist skills will finally be used at 100%! Don't worry too much,
though, it is easier than it looks like. And don't forget that our
leaves will be very small once mounted on the model, so precision is
not so important. Let's fire up the gimp, and open our first leave
image: |
The
gimp interface, for who doesn't know it, is a monument in the
open-source world, it has fed - and still feeds - much debate, some
find it awesome, other find it horrible, but it has contributed much to
the fine ergonomy of modern linux desktops.
It is quite simple
to learn, you have one main toolbox and a number of panels (layers,
brushes, etc...) that can be grouped any way you want.
The gimp uses your desktop as application background, and its windows simply hover on your desktop.
So let's begin with opening our first png image. | 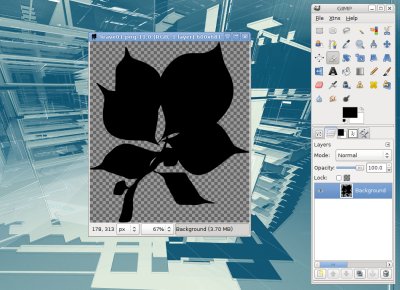 |
| We will first prepare our image for painting on top of it by adding a new layer, then we'll put some first lines of paint: |
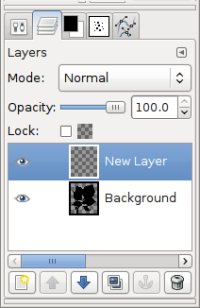 |  | 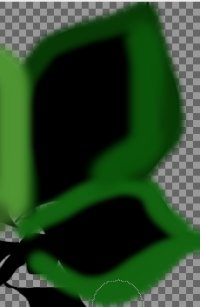 | 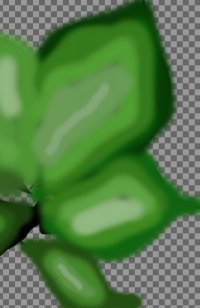 |
| 1. Add a new layer in the layers panel, and make sure it is selected (we don't want to paint directly on the black leaves layer) | 2.
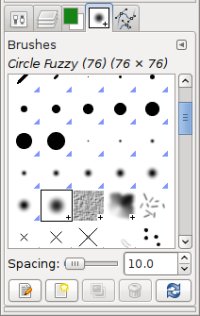
choose a soft brush, and a green color more or less similar to the
leave colors of our documentation. You can even pick a color from it
directly from the gimp color panel | 3.
begin to paint on the borders of the leaves. Don't try to be very
precise. Change the color a little bit between one leave and another | 4.
cover the black parts with other shades of green, going from dark to
brighter (or something else, as your inspiration dictates :) |
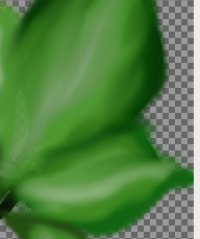 |  | 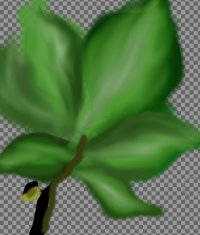 | 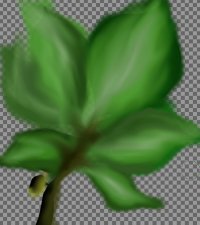 |
| 5.
Using the smudge tool, begin to mix the colors. Try to smudge the
colors together so the "border" between green shades disappear | 6. You may need to reapply a bit of paint, since the smudge tool "consumes" much paint, especially the darker tones. | 7. This is more or less enough for now. Now do the same with the branch and fruits, but keep the branch dark. | 8. that's it for the main painting! |
This
is normally enough painting if you won't look at your tree from very
close. There will be thousands of those leaves, so there is no need to
be very precise. But just if you are interested in painting further,
here is what you could do (do this on a separate layer):
Paint a
couple of bright and dark "veins" (see how our leaves are in the
documentation pictures), and smudge them with a quite big soft brush. | 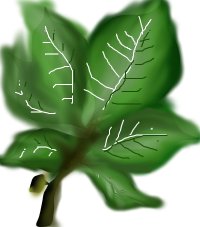 | 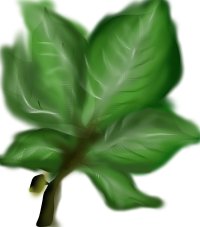 |
| Now
we are almost done, all we need is to cut our leaves to the right
shape. Remember that we didn't paint directly on the black shape, but
rather made a new layer on top of it? That's because we'll need the
original shape now: |
1.
Select the black layer in the layer stack, right-click on it and select
"Alpha to selection". This will select everything that is not
transparent on the black layer.
Then, on the image, do menu
Select > Invert selection. Now, we have inverted the selection, so
everything outside the black areas is now selected. You begin to
understand, right? | 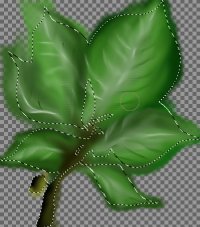 | 2.
Now select the painted layer in the layer stack, and simply press the
delete key. That's it! We have now a ready-to-use textured leave!
All
we need now is to save the image in an image format that has
transparency support and that can be read by blender, like TIFF, TGA or
PNG. My favorite is PNG, because you can control the filesize, so it
usually make images much smaller than the two other formats. | 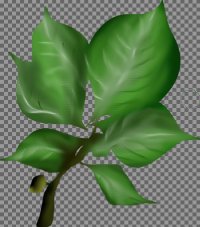 |
One last thing needed, to do the same with the other leave.
Try to use a bit different tones of green, so the mixture of the two leaves systems will produce interesting results.
If you want to have a closer look at the finished textures, just click the images here to examine them at full size...
| 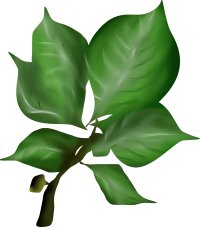 | 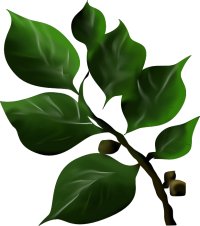 |
Now
we still need to create a texture for the trunk and branches.
ngPlant creates texture mapping around each branch like if it was a
cigarette paper. So we need either to make a long strip or a smaller,
squared one that we will repeat several times. Since the trunk will not
appear much, let's do a small one.
One our examples it is hard
to see how is the bark, but we can see two things: 1) it has no
"stains" of different colors, and 2) it seems that there is not much
bump. So our work will be simple, we'll simply create a very generic
black and white veiny "bump" pattern that we'll use to give some life
to the trunk. The color will be made directly in blender. So let's
create a new drawing, choose something about 512x512 pixels, for
example. |
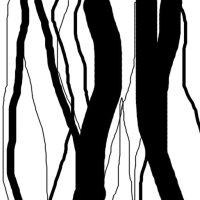 | 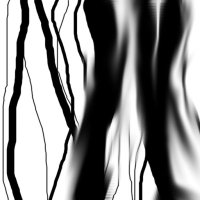 | 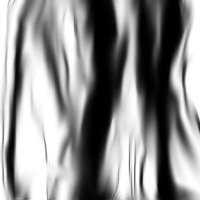 | 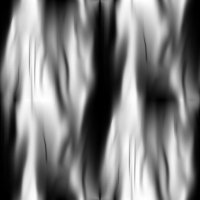 |
| 1. Take a sharp brush and draw several randomic lines with different widths | 2. With our beloved smudge tool, begin to smudge those lines together. Choose a big soft brush. | 3. Okay, that seems enough, every sharp line has been well smudged. | 4. Filters > Map > Make seamless |
| That's it! Now that the texturing part is over, let's put all together in blender... |
| | | |
| 6. PUTTING ALL TOGETHER: BLENDER |
Probably,
if you are reading this tutorial, you know blender already, and the
following will be very simple for you. For those who don't know
blender, it might be a good idea to learn a bit of it outside this
tutorial, since it behaves quite differently from other 3D
applications, and newcomers are usually a bit lost in blender's very
unusual interface. I won't cover much of blender interface here,
since why would you want to make blender trees if you don't use blender
already, right?
But at least, I'll present the software, so the blender section will not look poorer than the others... |
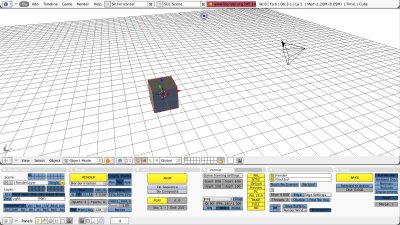 | This
is the blender interface. It has several subwindows, that can be
resized, reorganized and splitted, the main ones (shown here) being the
3d view and the buttons view, that contain all the settings button to
configure everything that happens on your scene.
Basic things to
know to find your way in blender, is that you have an "object mode" for
manipulating whole objects, and an "edit mode" for editing meshes
internals (vertices, edges and faces). Most of the blender commands and
functions are accessed from the toolbox that appear when you press the
spacebar. |
Well
that's about all I'll say about blender here. Sorry if you don't know
how to use blender, you'll probably feel a bit lost from here. But I'm
sure that by reading a couple of tutorials, you'll be able to follow
this in no time.
Okay,
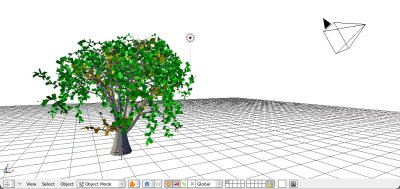
enough blender bla-bla, let's do our work. After deleting the default cube, in the file menu, locate the
import wavefront .obj entry, and import the .obj tree we just exported
from ngPlant. When asked for import options, you can just accept the default
ones. Our tree will get perfectly imported in blender: |
 | Now
we'll need to do 3 things: Apply our textures on the leaves, create a
material and some bump on the trunk, and setup a nice lighting.
The
first step is easy. The imported tree is already perfectly UV-mapped,
so it'll be a piece of cake. The second step will require a bit of
tweaking. |
| Let's
begin with the leaves. Choose one of the leaves layer, and it'll have a
default material alreay created. Rename that material to something more
understandable, change the green color to something more realistic,
and, for the moment, remove any specular value: |
 |
| Now
let's add our first texture. Remember I made a yellow layer with bigger
leaves than the green one? So let's use our smaller texture for the
green layer. Map it as Flat, using UV coordinates, and map it to
Color and Alpha. You'll also need to turn on the ZTransp button and put
the Alpha value of our base green color to zero: |
 |
| Okay,
first one is ready! Now just do the same for the second layer (or make
a copy of this material, and apply it to the second layer). For the
third layer, just use one of these two. Doing a rendering now will
produce something like this: |
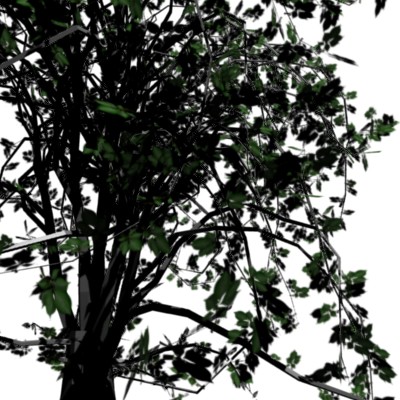 | We
can already see a couple of things that we can improve. For example the
leaves could be bigger, and the branches could have a bit more
sudivisions.
That is work to do in ngPlant, so we'll need to go back there, do the changes, and export again.
Then,
in blender, delete our current tree and immediately import the new one.
This way, the materials we just made will still be present, and it will
be easy to apply them to the new tree (blender only deletes unused
materials when you close the file).
Once this is made, let's
make a material for the bark. Make it brown, and map our brown texture
to Normal (you can map it to color too, if you want to create slight
color variation).
|
 |
Now all we need is to apply that material to all branches of the tree.
Take
good note of the name you give to the bark texture because we'll need
it right now. Notice that I set the sizeY value to 2, because we made a
square texture, but it will be mapped like a cigarette paper around the
branches. So this way, our cigarette will be made of two of our texture
squares, one above the other. Maybe you'd need to put a higher value
there, depending on your tree. But since the trunk is the most visible
branch, make sure at least that one looks good. |
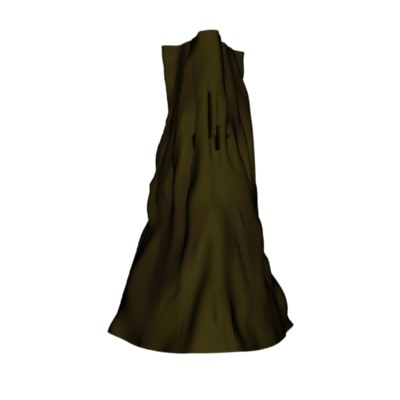
One interesting and easy thing we can do to enhance the trunk is to add real displacement to it:
1) make it smooth
2) add a subdivide modifier to it, and raise the levels to something like 4 or 5, depending on your tree
3) add a displace modifier, use your bark as texture, and set the texture coordinates as UV. The result should look like this:
You can of course tweak a bit more your material, and the modifiers settings until you get something you like.
|  |
Okay, we are almost done! Now the last step is to make a nice render of this.
You
can place your camera more or less where would be a person looking at
the tree. Or, if you plan to make an image that will be used on a
billboard plane, you might want to put your camera to front view and
make it orthographic.
After you placed your camera, place one or
two lights near your camera. You can change a bit the color and the
position, to give some light effects: |
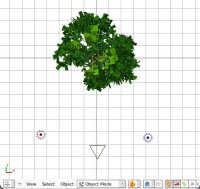 | 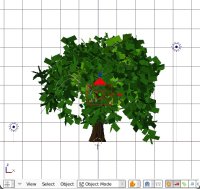 | I
placed two lamps, one higher and one lower, so my tree will be well
lit. I made the higher one yellowish, and made it cast shadows. The
other one is a soft blue, with no shadows. But you might find
interesting things by experimenting a bit other color combinations.
|
| And here is the final render: |
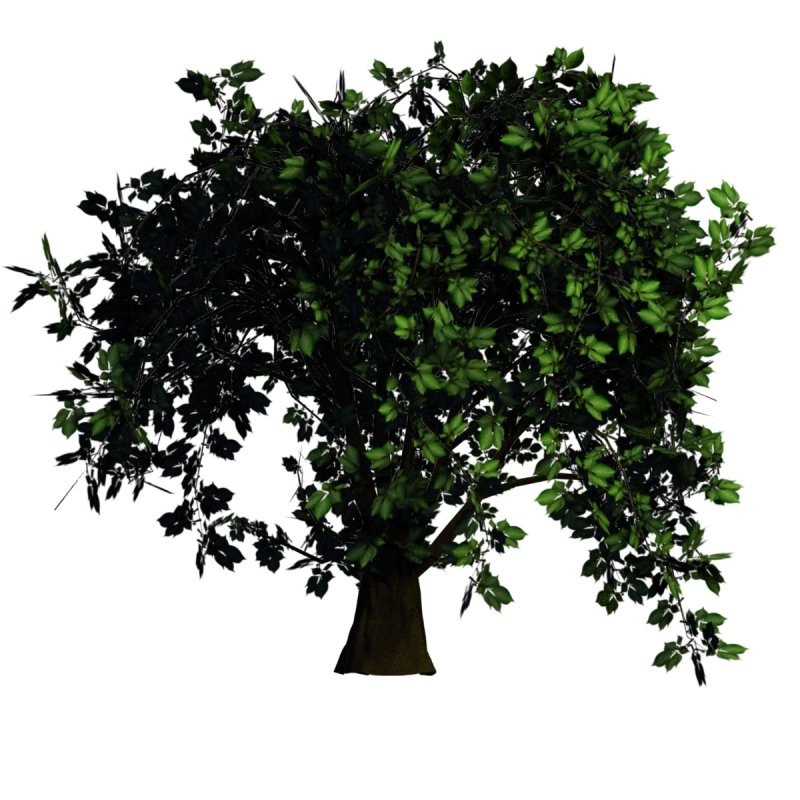 |
That's
it! If you want to produce a good quality texture for billboarding,
render it in RGBA mode with a black background, and save it as a PNG
file. If you want to have a look at my blend file, you can
download it here.
I hope I could
convince you that it is not too hard to make a basic tree. Of course
you can still refine much the result, make finer leaves, make more
different textures, etc. All depends on the time you want to put on it.
But this level satisfies me and meets what I need, so I usually stop
when I arrive here.
Now, one last cool thing you might do, if you create a nice tree, is to add it to the blender greenhouse so everybody can enjoy it...
Cheers,
Yorik |


